Caffe-ssd的Python接口封装

SSD目标检测算法的python调用接口改写与封装,视频检测一步到位,只专注于便捷与高效。

版权声明:本文为博主原创文章,未经博主允许不得转载。

前因

之前都是使用C++进行调用SSD,最近因项目需要,整个工程都转用Python语言进行开发,因此尝试使用Python语言调用SSD。
在正常编译完caffe-ssd后,在工程的/example目录下,有官方给出的使用python调用ssd的例子。
"da"

需要下载安装Jupyter notebook才可正常阅读ipynb文件,点击安装Jupyter
使用Jupyter打开ssd_detect.ipynb,
"da"
"da"
"da"
"da"
"da"

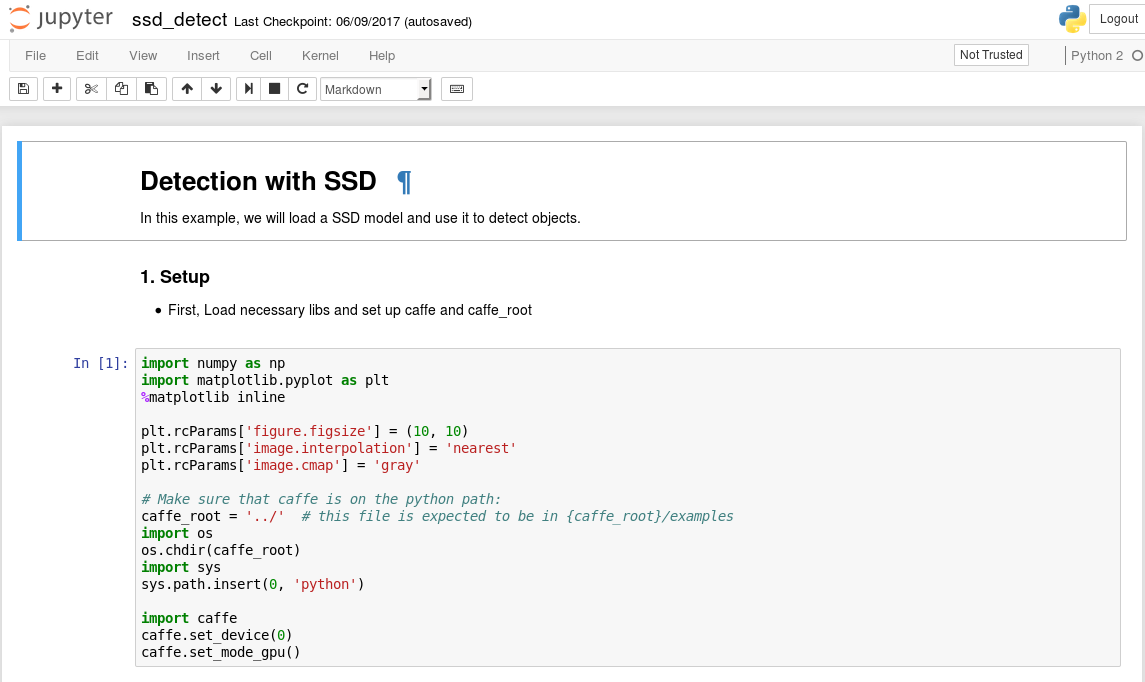
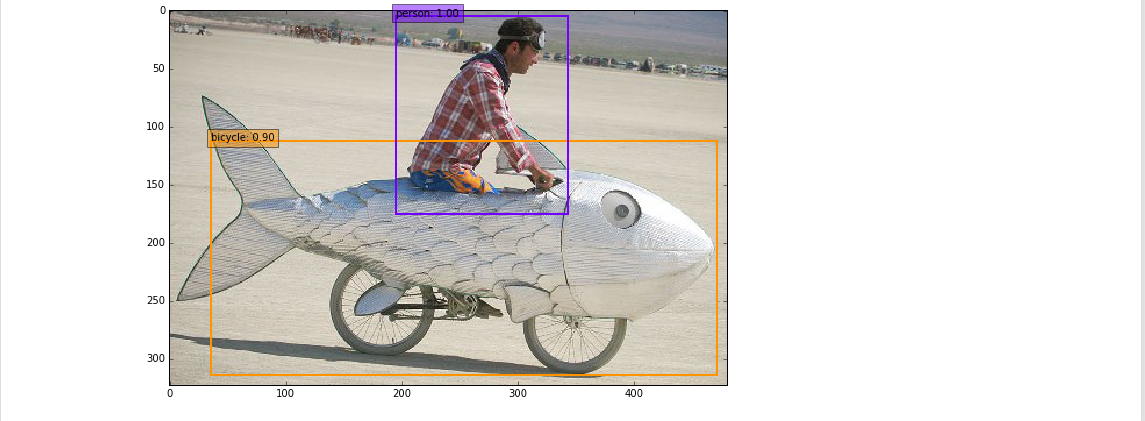
在这个例子中,图片显示与绘框操作使用的是matplot库,图片格式通道转换使用的是caffe中的transformer类。经过测试,transformer类的转换速度较慢,会影响SSD的对连续帧的检测速度,而opencv对于图片的处理比较简易且高效,因此可将所有对图片的操作转为opencv。

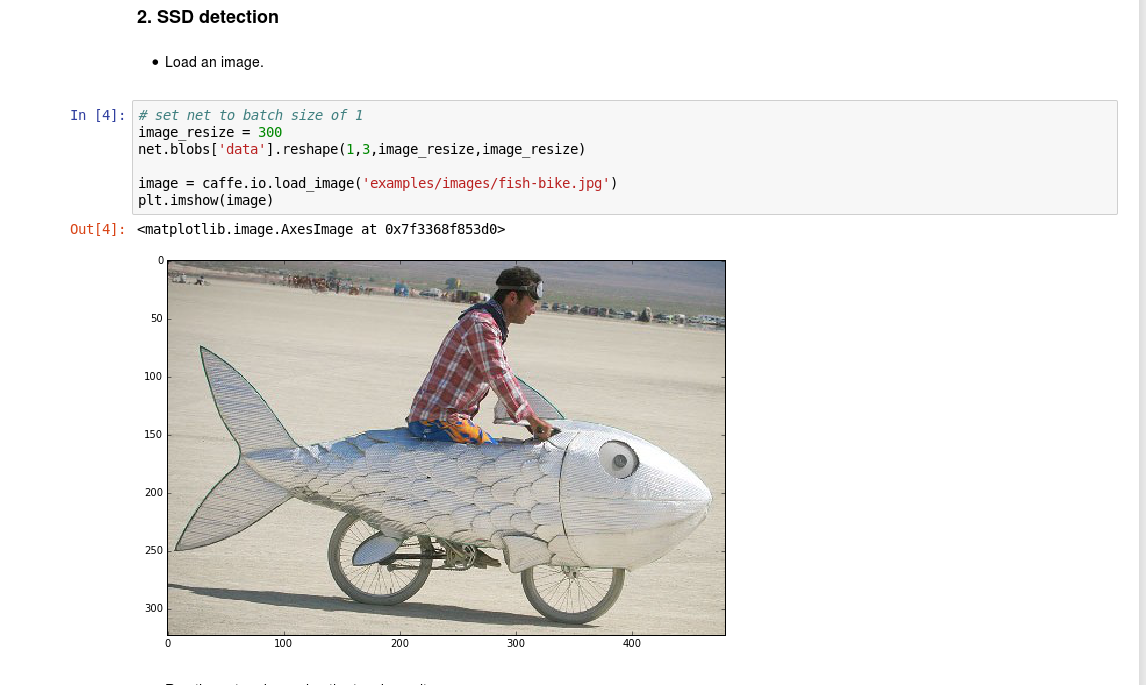
cv2.imread()接口读图像,读进来是BGR格式,数据范围在0~255
caffe.io.load_image()读进来是RGB格式,数据范围在0~1(float)

在测试网络的时候,是先给net.blobs[‘data’].data[…]赋值,加载数据,然后进行net forward操作,最终输出结果。
caffe输入图片格式要求为H×W×K,BGR格式,数据范围0~255

后果

了解完来龙去脉后,使用opencv函数将原来程序中的图片操作全部代替,并且将网络的初始化与网络的测试分别进行封装,写成一个类,方便后续其他程序调用。
附上代码:

1
2
3
4
5
6
7
8
9
10
11
12
13
14
15
16
17
18
19
20
21
22
23
24
25
26
27
28
29
30
31
32
33
34
35
36
37
38
39
40
41
42
43
44
45
46
47
48
49
50
51
52
53
54
55
56
57
58
59
60
61
62
63
64
65
66
67
68
69
70
71
72
73
74
75
76
77
78
79
80
81
82
83
84
85
86
87
88
89
90
91
92
93
94
95
96
97
98
99
100
import sys
sys.path.append('/home/yourname/caffe-ssd/python')
import numpy as np
import cv2
import os
import time
import caffe
class ssd:
#计算BoundingBox在图片中的位置,网络中计算出的结果为比例值
def ScaleBoundingbox(self,bbox,width, height):
bbox[0] *= width
bbox[1] *= height
bbox[2] *= width
bbox[3] *= height
return bbox
#在图片中绘制检测框
def vis_detections(self,im, class_name, dets,width,height,threshhold):
inds = np.where(dets[:, -1] >= threshhold)[0]
for i in inds:
bbox = dets[i, :4]
bbox = self.ScaleBoundingbox(bbox, width, height)
score = dets[i, -1]
cv2.rectangle(im,(int(bbox[0]), int(bbox[1])),(int(bbox[2]), int(bbox[3])),(255,0,0),2)
cv2.putText(im, "{:s} {:.3f}".format(class_name, score), (bbox[0], (int)(bbox[1]+10)),
cv2.FONT_HERSHEY_SIMPLEX, 0.5, (0,0,255), 1)
#图片预处理
def preprocess(self,img, mean_data=[104,117,123]):
img = np.float32(img)
mean = np.array(mean_data, dtype=np.float32)
#一般地,图片减去均值后再进行训练和测试,会提高速度和精度。
img -= mean
#opencv读取的图片文件格式为H×W×K,需转化为K×H×W
img = img.transpose((2, 0, 1))
return img
#SSD检测单张图片
def ssd_detect(self,net, img, input_height, input_width):
img = cv2.resize(img, (input_height, input_width))
net.blobs['data'].reshape(1, 3, input_height,input_width)
img = self.preprocess(img)
net.blobs['data'].data[...] = img
#Forward pass.
detections = net.forward()['detection_out'][0, 0, :, :]
#detections[0,0,:,1] ---label
#detections[0,0,:,2] ---conf
#detections[0,0,:,3] ---xmin
#detections[0,0,:,4] ---ymin
#detections[0,0,:,5] ---xmax
#detections[0,0,:,6] ---ymax
return detections[:, 1:]
#初始化
def __init__(self):
caffe.set_device(0)
caffe.set_mode_gpu()
caffe_root = '/home/yourname/caffe-ssd/' #
os.chdir(caffe_root)
self.model_def = 'models/VGGNet/VOC0712/SSD_300x300/deploy.prototxt'
self.model_weights = 'models/VGGNet/VOC0712/SSD_300x300/VGG_VOC0712_SSD_300x300_iter_120000.caffemodel'
self.CLASSES = ('__background__', 'aeroplane','bicycle', 'bird','boat','bottle','bus','car',
'cat', 'chair','cow','diningtable','dog','horse','motorbike','person',
'pottedplant','sheep','sofa','train','tvmonitor')
self.class_detection = ('car','bus','person')
self.net = caffe.Net(self.model_def, # defines the structure of the model
self.model_weights, # contains the trained weights
caffe.TEST) # use test mode (e.g., don't perform dropout)
#视频检测接口
def Videodetect(self,videofile):
videoCapture = cv2.VideoCapture(videofile)
video_width = int(videoCapture.get(cv2.CAP_PROP_FRAME_WIDTH))
video_height = int(videoCapture.get(cv2.CAP_PROP_FRAME_HEIGHT))
cv2.namedWindow("test", cv2.WINDOW_NORMAL)
success, image = videoCapture.read()
while success:
begin_time = time.time()
object_pool = self.ssd_detect(self.net, image, 300, 300)
for cls in self.class_detection:
cls_ind = self.CLASSES.index(cls)
detect_object = object_pool[np.where(object_pool[:, 0] == cls_ind)[0]]
if len(detect_object) == 0:
break
cls_scores = detect_object[:, 1]
cls_boxes = detect_object[:, 2:]
dets = np.hstack((cls_boxes,
cls_scores[:, np.newaxis])).astype(np.float32)
#print dets
self.vis_detections(image, cls, dets, video_width, video_height, threshhold = 0.6)
end_time = time.time()
cv2.imshow('test', image)
success, image = videoCapture.read()
during_time = end_time - begin_time
print ('Detection took {:.3f}s').format(during_time)
if cv2.waitKey(1) & 0xFF == ord('q'):
break

接下来可以进行简单测试

1
2
3
import SSD
hello =SSD.ssd()
hello.Videodetect('your video path')

"da"

-------------本文结束感谢您的阅读-------------